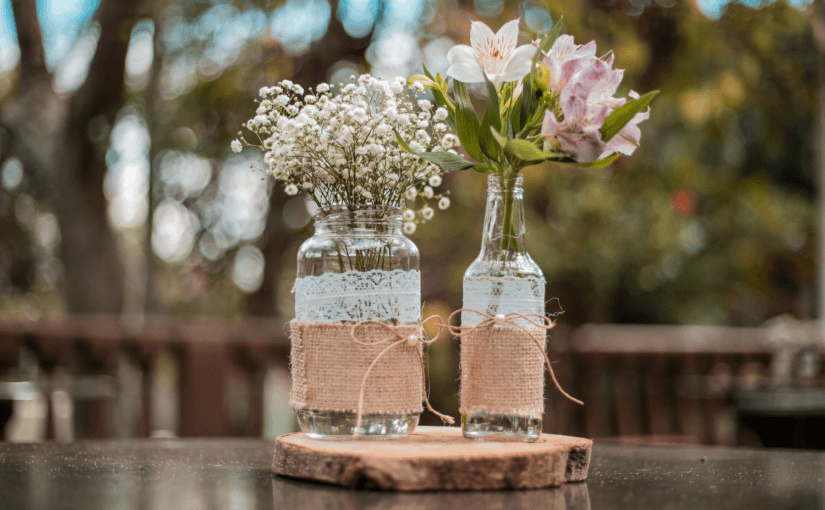
Are you a creative groom, thrifty bride, or an artistic duo looking to infuse your wedding with unique charm and personalised flair? Look no further! Whether you’re envisioning a rustic barn affair, a whimsical celebration, or a chic city wedding, we’ve got the DIY inspiration you need to create the perfect decor. Get ready to craft the wedding of your dreams with Bridebook.
Join us as we explore the top 70 DIY wedding decoration ideas. These will not only add that extra touch of magic to your celebrations and help bring your wedding theme to life, but also save you a penny or two along the way.
What are DIY wedding decorations?
DIY wedding decorations are any wedding favours, wedding centrepieces, table decorations, floral accents or displays, or general decor that you can make yourself. DIY wedding projects are fairly accessible, meaning most people with a glue gun and a roll of ribbon can tackle them with ease. However, it’s always recommended that you practise before making the final piece.
Whether you’re a seasoned crafter or just starting to explore your creative side, DIY wedding decorations offer endless possibilities for making your special day truly one-of-a-kind. Plus, you can easily match them to your overall colour scheme or wedding theme for a cohesive look.
Top 70 ideas for DIY wedding decor
The possibilities are endless with DIY wedding decor. We’ve compiled a list of 70 of the most popular types of handmade decor. But, feel free to let your creativity run wild and personalise these ideas to suit your unique style and vision for your big day.
Bouquets, buttonholes, and floral accents
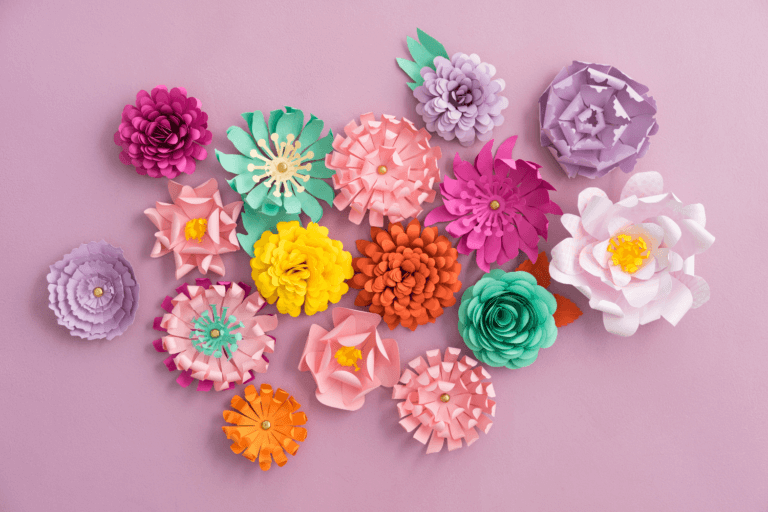
1) Handmade paper flower bouquets
The beauty of paper flowers is that they won’t wilt after the wedding or create a damp patch on your dress!
Pick a handful of your favourite paper flowers from a local craft store, tie them together with some satin ribbon or twine, and let your creativity bloom!
2) Fabric flower bouquets or buttonholes
Fabric flowers and buttonholes are a great alternative if you’d like something more robust than paper flowers. They offer a timeless elegance compared to paper flowers and will usually come in more colours or styles than paper flowers.
Pick a bunch of your favourite fabric flowers from a craft store and tie them together using satin or silk ribbon. The ribbon colour should match your overall wedding theme for a feeling of cohesion.
3) Fabric flower crowns
Consider matching your fabric bouquet or buttonholes with a fabric flower crown. This will add a boho feel to your outfit and give you something to attach your veil to. Simply pick your desired fabric flowers, arrange them into a crown shape, and secure them with floral wire or ribbon.
If you’re not the most adept at flower weaving, check out some premade flower crowns online. You can then customise the already-prepared crown with ribbon, buttons, or extra flowers. Don’t worry — we won’t tell anyone!
4) Dried flower bouquets or buttonholes
Dried flowers bring a whimsical and fairy-like energy to your special day. Perfect for bohemian, rustic, or vintage-themed weddings, these arrangements bring an earthy charm and a unique eco-friendly touch that will captivate your guests.
Simply pick your dried flowers from an online wholesaler or florist, tie them together with ribbon, twine, or burlap, and let their natural beauty shine! You can easily create buttonholes following the same method— the only difference is you use fewer flowers!
5) Hand-tied wildflower bouquet
What could be more beautiful than a bouquet inspired by nature’s bounty? You can either grow your own seasonal wildflowers or source them from a local florist or flower market. We don’t recommend picking them from a field or the side of the road. After all — you don’t know who they belong to!
Gather an assortment of blooms, including daisies, lavender, bluebells, and more. Tie them together with twine for a charmingly rustic look. These hand-tied wildflower bouquets are perfect for a laid-back outdoor wedding, whimsical weddings, or a bohemian-inspired affair.
6) Paper rose bouquets crafted from book pages or sheet music
If you’re a bookworm or a music lover, this is the perfect bouquet for you. You can create a bouquet of origami roses using pages from your favourite book or sheet music from your favourite song. We know — sounds tricky, right? But, it might not be as difficult as you think.
While the first flower might be a little untidy, we promise you’ll get the hang of it quickly. Look up some online tutorials or try searching for a book on origami in your local library. Pretty soon, you’ll be an origami pro and folding gorgeous, meaningful flowers at record speed. Plus, what better way to subtly incorporate your favourite literature or song into your big day than by carrying it with you?
7) Handmade clay flowers
If you’re handy with a pottery wheel or even just enjoyed playing with plasticine as a kid, carrying a bouquet of handmade clay flowers as you walk down the aisle will be a testament to your creative spirit and attention to detail.
We recommend using an air-dry clay for this and that you leave plenty of time for drying. Sculpt each petal with care, but don’t be too worried about making each one perfect. Don’t forget — real flowers aren’t at all symmetrical!
Craft your petals one at a time and then combine them into the shape of a flower. Skewer each flower on some twisted wire or wooden sticks for a faux stem. Once dry, finish your masterpiece with paint and coat with PVA glue for a glossy finish.
Wedding centrepieces and table decor
8) Mason or jam jar candle holders decorated with lace, twine, or ribbon
Mason jars were really popular wedding decorations a few years ago, and the resurgence of Pinterest has breathed new life into their versatility.
Transform simple mason jars into elegant candle holders with a touch of lace, twine, or ribbon. If you don’t have any lying around and don’t feel like forking out for new mason jars, jam jars are the perfect British alternative for this Americanised decor choice.
Whether you’re aiming for a rustic, vintage, or bohemian theme, these charming accents will add warmth and ambiance to your tablescape. Plus, they’re easy to customise to match your wedding colours and style.
9) Burlap table runners
Again, burlap table runners are the perfect choice for a boho, rustic, or bohemian-style wedding. Simply lay them down in the centre of your tables for an effortlessly chic look. Try to lay them as aesthetically as possible, with a light scrunch to add to the textured effect.
Burlap’s natural texture adds warmth and character to your decor, while its neutral colour complements a variety of wedding palettes.
10) Painted mason or jam jars filled with wildflowers
Paint your mason jars in either a chosen wedding colour or a neutral shade to make them stand out. Let them dry, then fill them with an assortment of wildflowers, or re-use your bouquet flowers for an eco-friendly twist. Jars can either sit on their own as a centrepiece or be clustered together as statement decor.
Again, mason jars can easily be replaced with jam jars for a more accessible, British twist.
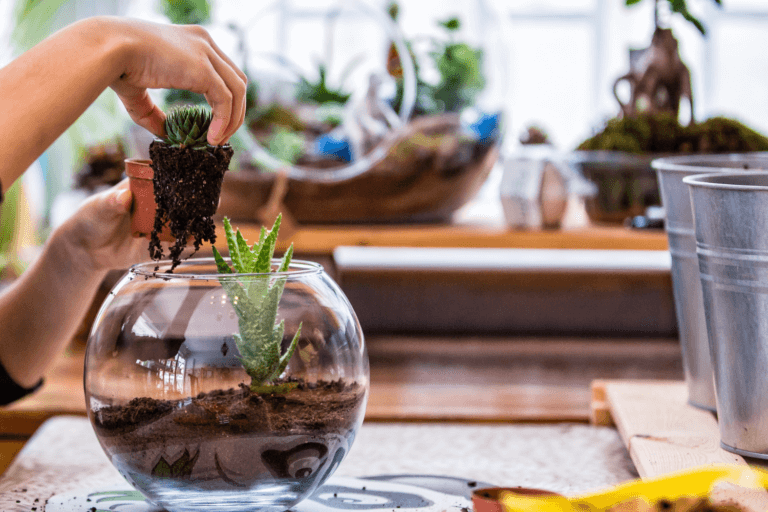
11) DIY terrarium
If you’re a bit of a botanist, creating DIY terrarium centrepieces is a wonderful way to showcase your green thumb. Choose a variety of succulents, air plants, and moss to create miniature landscapes inside glass containers. Layer sand, pebbles, and activated charcoal for proper drainage, then add your house plants and decorative elements like driftwood or miniature figurines.
These miniature ecosystems are the perfect way to bring a unique touch of nature to the table. Plus, guests can easily take them home as keepsakes or wedding favours!
12) Pressed flower or leaf table numbers
Using pressed leaves or flowers offers an organic touch to your table numbers. Plus, it’s a great way to incorporate more nature into your big day without the added cost of fresh flowers. You can either buy pressed leaves and flowers online or spend some time in the months before the ceremony pressing your own.
This DIY approach allows you to showcase the beauty of nature in a sustainable and budget-friendly way.
13) Crocheted or knitted doilies as table runners
If you love crochet or are an avid knitter, it’ll take you no time at all to whip up a stunning table runner using crocheted or knitted doilies. These intricate pieces add a touch of vintage charm and cosiness to your table decor. Plus, you have full control over the wool or cord used, meaning a perfect match for your wedding’s colours.
14) DIY terracotta pots with hand-painted designs
You can bulk-order small terracotta pots online and paint them with fun designs for some wholesome wedding decor. Add inside jokes from your relationships, doodles of your favourite places, or even just paint pretty flowers that match the theme of your wedding.
Whatever you decide, these hand-painted terracotta pots will add a fun and creative touch to your special day.
15) DIY pressed flower candles
Once you’ve got the hang of pressing your own flowers, it’s quick and easy to add them to a range of decorations.
Creating your own DIY pressed flower candles is as simple as glueing pressed flowers onto regular pillar candles. Choose blooms that complement your wedding theme or colour scheme, then carefully adhere them to the candles using a dab of PVA or hot glue. They’re simple, effective, and elegant.
16) DIY snow globe centrepieces
If you’re having a festive or winter wedding, consider using snow globes as centrepieces or table decor for a sweet and whimsical twist. You can use cute couple photos, holiday snaps, or even cringey Christmas pictures from when you were a kid.
You can buy empty snow globes online in bulk. They’re usually filled with snow globe fluid and glitter. However, if they aren’t, you should also be able to purchase that online. Fill each globe with liquid, fake snow or glitter, and your photo of choice.
Place cards
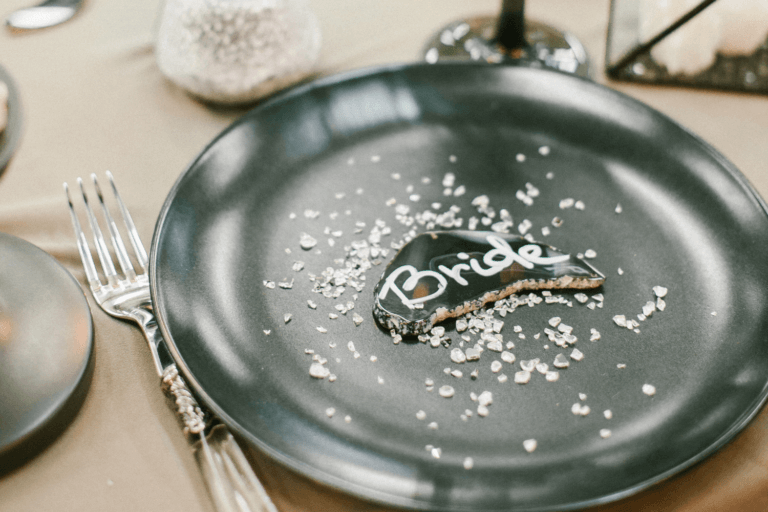
17) Handwritten calligraphy place cards
If you’re a dab hand with calligraphy ink and pens, try writing your place cards for an elegant touch. Use thick card stock and carefully write each guest’s name in calligraphy ink.
If you have a large guest list or aren’t too confident in your abilities, you can also hire professional calligraphers to write the place cards on your behalf!
18) Wine cork place card holders
If you fancy yourself a sommelier or simply love a glass of red in the evening, repurpose your used corks into charming place card holders. Slice a thin slit lengthwise into the top of each cork using a sharp knife, deep enough to hold a place card securely. Then, neatly write or print each guest’s name on small cards and insert them into the slits.
These wine cork place card holders add a rustic and eco-friendly touch to your table settings. Plus, they’re perfect for vineyard celebrations.
19) Hand-painted rocks or stones
Hand-painting beach stones or pebbles is a budget-friendly place card option. Simple head down to the water, pick up a handful of stones, then spend some time painting your guests’ names and some pretty patterns on the flattest surface you can find.
Pro tip: Specifically selecting stones with flat or wide edges will make this job much easier!
20) Painted wooden clothes pegs holding place cards
Another budget-friendly option for place cards is to use painted wooden clothes pegs.
Simply purchase wooden clothes pegs (or repurpose the ones you already have) and paint them in your wedding colours or desired theme. Once dry, use them to secure small cards with each guest’s name written on them. You can attach the cards to the clothes pegs with string or ribbon for a rustic touch.
21) Personalised paper aeroplane place cards
Perfect for destination or travel-themed weddings, personalised paper aeroplane place cards will add a fun and whimsical touch to your place settings.
Create paper aeroplanes from cardstock or lightweight paper, then write each guest’s name and table number on them. You can also customise them further with travel-themed stamps or stickers.
But, be warned — guests are likely to throw them after a few drinks. If you don’t want your guests getting rowdy, we recommend skipping this option.
Bits-and-bobs
22) Personalised wedding programme fans
If you’re planning a destination wedding, beach wedding, or even a high summer wedding, your guests might appreciate a cool breeze here and there. Having your wedding programmes printed on fans is a great way to keep your guests comfortable while also providing them with important information about your special day. It adds a fun and practical touch to your ceremony.
You can easily create your own DIY fans, too. Try finding an online template and filling in the blanks using a free editing tool like Canva. Once you’ve customised the design to match your wedding theme and included all the necessary details, simply print them out, fold them in a concertina style, and attach them to wooden sticks or handles.
23) Embroidered handkerchiefs with the couple’s initials
If you’re a dab hand with a needle and thread, personalised or monogrammed handkerchiefs will add a touch of class to your special day while giving your guests a way to dab their eyes during the ceremony.
Simply buy a bulk pack of fabric handkerchiefs online, and embroider your initials, a small motif, or a special message onto each one. Your design should be quite simple, as you’ll likely need to embroider a large number of handkerchiefs.
24) DIY ribbon wands for young guests
DIY ribbon wands for young guests are a sweet addition to your wedding festivities. These whimsical wands add a touch of magic and entertainment to your celebration, as guests can twirl them around during the ceremony or reception.
To make them, all you need are wooden sticks, colourful ribbons in your wedding colours, and some glue or tape. Simply attach the ribbons to one end of the stick securely, leaving them long enough to create beautiful swirling patterns when waved. You can customise the ribbons with beads, bells, or charms for extra flair.
Pro tip: These wands make a great addition to the classic ‘exiting the church’ photo op!
25) Custom temporary tattoos
If you’re a tattooed couple or simply just love the fun of temporary tattoos, consider dotting customised, temporary tattoos around your wedding reception for guests to adorn themselves with.
Although it may be difficult to DIY the actual tattoos without specialist equipment, you can certainly DIY the design or work with a professional tattoo artist to bring your vision to life. Think about incorporating symbols, quotes, or illustrations that hold special meaning to you and your partner, or that reflect the theme of your wedding.
26) Crocheted or knitted chair covers
Although time-consuming, crochet or knitting chair covers can be a satisfying DIY project that adds a personal touch to your special day. Plus, you can reuse them in your home after you’re done!
You’ll need to find an online pattern that suits the height and size of your chairs, then select your favourite wool colours to match your wedding theme or home decor. Once you’ve got your materials ready, it’s all about getting cosy with your crochet hook or knitting needles and creating something truly unique and beautiful.
Don’t worry if it takes a bit longer than expected — the end result will be worth every stitch!
27) Handmade paper confetti
Handmade paper confetti can be made from coloured paper, scrapbook paper, old newspaper, sheet music, and more. Start by cutting the paper into small, uniform shapes using a paper cutter or scissors. You can create classic shapes like circles or hearts, or get creative with custom shapes that reflect your personality as a couple.
Once you have your paper cutouts ready, gather them into small bags or collect them in a large bowl so guests can grab a handful ready to toss during your celebration.
Make sure to check whether your venue allows paper confetti. Many venues have banned paper confetti in recent years, opting for more sustainable options like flower petals or dried leaves.
28) Painted wooden fans for outdoor summer weddings
Painting your own wooden fans is a great way to help guests keep cool while enjoying an outdoor summer wedding. You can purchase plain wooden fans online or at craft stores and then let your creativity flow as you paint them with beautiful designs, patterns, or even your wedding date and initials.
29) Hand-stamped cocktail napkins
If you’re considering a cocktail hour, think about printing cocktail napkins with fun facts about the happy couple, your initials, or even just the date of the wedding. You can buy rubber stamps online or even make one out of a potato for a rustic look!
Wedding favours
30) Personalised tea bag favours
English breakfast, Earl Grey, or blueberry bliss — what’s your tipple?
Handing out personalised tea bags as wedding favours is the perfect way to share your favourite brew with your guests while also adding a thoughtful and personalised touch to your wedding favours. You can choose your favourite tea blends or create custom blends that reflect your taste as a couple.
To personalise them further, consider designing custom labels with your names, wedding date, or a special message for your guests. You can print these labels at home or order them from a printing service.
31) Homemade infused olive oil or vinegar in decorative bottles
If you fancy something a bit more continental, consider infusing your own chilli or garlic olive oil in decorative bottles.
This one will take careful prep and patience, but the result is well worth it! To make homemade infused olive oil or vinegar, start by selecting high-quality olive oil or vinegar and fresh herbs, spices, or fruits for infusion.
Thoroughly clean and sterilise decorative bottles or jars, then add your chosen ingredients to the bottles. For olive oil, you can infuse it with garlic cloves, chilli peppers, rosemary, thyme, or any other herbs and spices you prefer. For vinegar, fruits like berries, citrus peels, or herbs like basil and mint work well.
Once you’ve added the ingredients, seal the bottles tightly and let them sit in a cool, dark place for several weeks to allow the flavours to infuse. Be sure to shake the bottles occasionally to help distribute the flavours evenly. Add a personalised label or tag to ensure guests associate the oil with your big day, and voila! The perfect DIY wedding favour.
32) Homemade soy candles
You can purchase soy wax and candle-making supplies online or from hobby shops to create your own homemade soy candles. These are a great option for vegans, animal lovers, or anyone who prefers a clean-burning candle alternative.
Start by melting the soy wax flakes in a double boiler or bain-marie, then add your chosen fragrance oils or essential oils to scent the candles. Pour the melted wax into containers like jam jars, aluminium tins, or vintage teacups, and carefully insert a cotton wick into the centre of each container.
Decorate the outside of the container with stickers, doodles, or the date and location of your wedding. Soy wax candles are the perfect wedding favour for those that appreciate a little fragrance and a touch of luxury.
33) Hand-painted napkins
Hand-painted napkins are easy to create, especially if you have artistic inclinations. All you’ll need is a bulk order of napkins, fabric paint, and small paint brushes. You could even get your friends and family involved in painting them for a fun pre-wedding activity!
Gather all your supplies and sit down to paint. You could try delicate floral designs, geometric patterns, or even personalised monograms that match your wedding theme and colours. Once the paint is dry, heat-set it according to the instructions on the fabric paint packaging to ensure it doesn’t wash out. Simple!
34) Homemade jam or preserves
Similar to homemade oils and vinegars, homemade jams and preserves are easy to create and add a delicious touch to your wedding ceremony.
Pick out your favourite fruits or berries and get ready to start. Whether you pick the classic sweetness of strawberries, the tanginess of raspberries, or the sunny goodness of peaches, your homemade jam is sure to be a hit.
Making jam can be tricky, so make sure you’ve watched a few YouTube tutorials before you get started. Cook up your chosen fruit with a bit of jam sugar and a splash of lemon juice until it bubbles and thickens. Sterilise your jars and pour in the jam. Make sure you leave a little space at the top so the jam can cool down. Once cool, seal them with a lid and add a fun label or pretty ribbon for an extra special touch.
35) Customised matchboxes
Customised matchboxes are fun and cost-effective DIY wedding favours. Simply gather some plain matchboxes, crafting supplies, and some willing helpers, and you’re good to go!
You can decorate the matchboxes with your wedding date, initials, or a sweet message to thank guests for their attendance. Get crafty with stickers, stamps, or even hand-drawn designs to make each matchbox unique.
36) Hand-stamped muslin favour bags
You can either create your own stamps using a potato or buy stamps online to customise cute wedding favour bags. Simply fill the bags with sweets, trinkets, or a lottery ticket for the perfect budget wedding favour.
37) Homemade potpourri sachets
Potpourri is easy to make and a great DIY option for wedding favours. Start by gathering your favourite dried flowers, herbs, and spices. Lavender, rose petals, cinnamon sticks, and cloves are all popular choices. Mix and match until you find a combination that smells just right.
Next, grab some small sachet bags or pouches. You can find these at haberdasheries, craft shops, or online. Fill each bag with your aromatic blend, making sure to tie them securely to keep the contents contained. Add a small ribbon, label, or thank you note to further personalise the gift.
38) Homemade bath salts or sugar scrubs
DIY beauty products like homemade bath salts or sugar scrubs are a luxurious and thoughtful option for wedding favours. Plus, they’re surprisingly simple to make and can be customised with your favourite scents.
To create homemade bath salts, start by mixing together Epsom salt or sea salt with a few drops of essential oils for fragrance. You can also add dried flowers or herbs for an extra special touch. Package them in small jars or pouches, and don’t forget to add a cute label or tag with your wedding details. Encourage guests to use them within a fortnight to prevent clumping.
For sugar scrubs, combine granulated sugar with coconut oil or olive oil and your choice of essential oils for scent. You can also add a splash of vanilla extract or cocoa powder if your guests have a sweet tooth. Package them in jars or containers and decorate with ribbons or labels.
39) Handmade bookmarks with love quotes or poems
Encourage your fellow bookworms to ‘get their read on’ by crafting handmade bookmarks with love quotes or love poems. This charming DIY favour is perfect for anyone who appreciates a good book.
Start by selecting sturdy cardstock or decorative paper in your wedding colours or theme. Cut the paper into strips of your desired bookmark size. Then, get creative with decorating! Write out your favourite love quotes, passages from meaningful poems, or even personal messages to your guests. Add small embellishments like ribbon, glitter glue, or stickers for a DIY touch.
40) Personalised seed packet favours
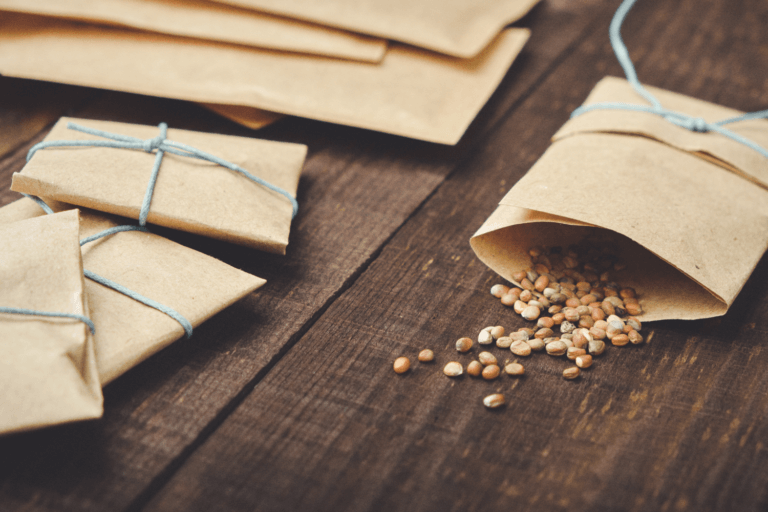
If you have a green thumb, are throwing an eco-friendly wedding, or simply want to encourage your guests to connect with nature, personalised seed packets are a great choice.
Buy some packets of flower seeds from your local garden centre. Try to get a good range of colours and flower types for maximum impact. Mix all the seeds together in a big bowl, then package the blend in small pouches or envelopes.
Try picking seeds that will bloom in your wedding colours for extra attention to detail.
41) Hand-dyed fabric napkins
Hand-dyed fabric napkins are great for anyone planning a colourful, boho, or eclectic wedding theme.
To create these charming napkins, start by selecting plain cotton or linen napkins in sizes that suit your table decor. Then, let the fun begin! Prepare a dye bath using fabric dye in your favourite colours, following the instructions on the package. Don’t be afraid to get creative and experiment with different dyeing techniques like dip-dyeing, tie-dyeing, or ombre effects for a stunning visual impact.
Pro tip: Don’t forget to iron the napkins after they’ve dried for a crisp, polished look.
42)Homemade scented sachets
Little bags of lavender, rose petals, or your favourite dried flowers make the perfect homemade wedding favours. Simply gather your dried flowers of choice into a small cloth pouch. Tie the top with some ribbon and add a little label or sweet message to thank guests for their attendance. You can also use herbs like basil, mint, or rosemary if you prefer earthy scents.
43) Personalised wooden coasters
If you have specialist woodworking tools like a branding kit or a wood engraving kit, you can easily create your own customised wooden coasters.
Simply gather some pre-made wooden coasters or some flat wooden discs. Engrave your initials, wedding date, a meaningful quote, or a whimsical design — the possibilities are endless!
44) Handmade paper fortune tellers with wedding trivia or fun facts
Paper fortune tellers are a fun and nostalgic DIY wedding favour. If you’ve never made one before, look up an online tutorial to ensure all fortune tellers function as intended. Include fun facts about your and your partner, wedding day trivia, or even predictions for the future. Get creative with the messages inside each fortune teller, ranging from sweet sentiments to funny predictions.
Once assembled, these paper fortune tellers are ready to delight your wedding guests with entertainment and laughter. Place them at each table setting or create a dedicated station where guests can pick one up as a memorable keepsake from your special day.
45) Homemade granola
If you can’t imagine starting your day without a bowl of tasty granola, making your own delicious concoction could be the perfect DIY wedding favour.
Simply gather your favourite oats, nuts, seeds, and dried fruits to create a custom blend that reflects your personal tastes. Mix them together in a large bowl, adding a touch of honey or maple syrup for sweetness and a drizzle of coconut oil for crispiness. Spread the mixture onto a baking sheet and bake it in the oven until golden brown and fragrant. Don’t forget to stir it occasionally to ensure even toasting!
Once cooled, package your homemade granola in cute jars or bags, and don’t hesitate to add a personalised label or tag with a heartfelt message for your guests.
46) Personalised bottle opener
Personalised bottle openers will help your guests remember the details of your big day every time they reach for your favourite tipple. You can customise them with your initials, wedding date, or even a fun quote that reflects your love story. Choose high-quality metal or wooden bottle openers that match your wedding theme or style.
47) Homemade soy wax melts
Soy wax melts have become increasingly popular wedding favours in recent years owing to their portability and eco-friendly nature. Create your own unique blends using high-quality soy wax and essential oils in your favourite scents. Whether it’s soothing lavender, refreshing citrus, or cosy vanilla, there’s a fragrance to suit every taste.
Package them in personalised cloth bags with special labels or tags that highlight your wedding date and initials for a heartfelt touch.
Decor and accents
48) Hand-cut paper butterflies or birds
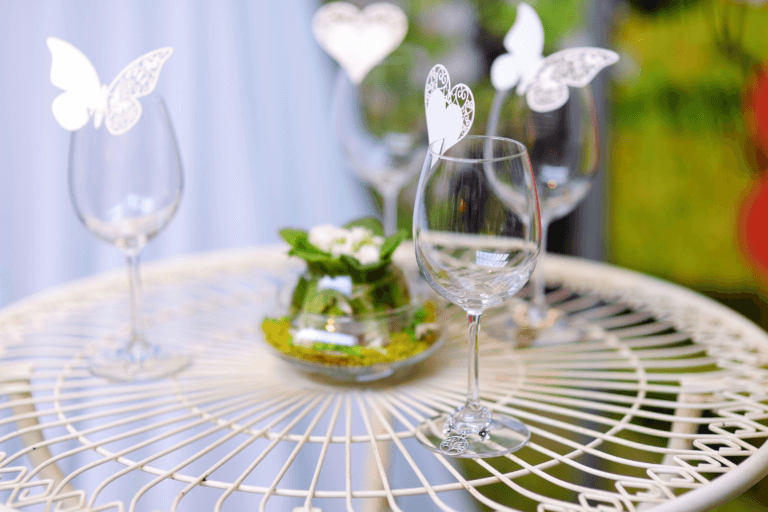
Decor and accents are the finishing touches that add personality and charm to any wedding celebration. For an enchanting touch, consider incorporating hand-cut paper butterflies or birds into your decor.
Gather colourful sheets of paper in your chosen palette, then let your creativity take flight as you carefully cut out delicate butterfly or bird shapes. You can find templates online to guide you or create your own unique designs.
Once cut, scatter these pretty paper accents throughout your venue, adorning tables, walls, or even hanging them for a dreamy atmosphere.
49) Origami paper cranes
If you have time on your side and want truly unique wedding decor, consider incorporating hand-folded origami paper cranes.
Start by gathering a range of colourful origami paper in patterns and shades that match your wedding theme. Then carefully fold each sheet into graceful paper cranes. Don’t worry if you’re new to origami — there are plenty of easy-to-follow tutorials online to guide you through the folding process.
According to Japanese tradition, folding 1,000 paper cranes is supposed to grant you a wish!
While folding 1,000 paper cranes might be a bit ambitious for your wedding, each crane you create adds a touch of charm and meaning to your celebration. So, even if you don’t reach that number, each crane symbolises hope, peace, and good fortune for your journey together as a couple.
50) DIY paper lanterns
Using paper lanterns as decor will infuse your wedding venue with a warm and inviting ambiance.
Start by selecting a variety of colourful or patterned paper that complements your wedding theme. Then, follow a simple online tutorial to construct your paper lanterns. You can choose from different shapes and sizes to suit your preferences. Once assembled, hang the lanterns from fairy lights, tree branches, or ceiling hooks for a beautiful display.
51) Pom-poms
You can easily create DIY pom-poms in a range of sizes, shapes, and colours to decorate your venue.
You’ll need two pieces of cardboard that resemble doughnuts. Think small circles with a hole in the middle. Loop some wool or string in a colour of your choice through the middle of the doughnuts and wrap it around the cardboard until you’ve achieved your desired thickness. Then, carefully cut around the edges of the wool or string, making sure to hold it securely in place.
Once you’ve cut all the way around, tie another piece of string tightly around the middle of the looped wool or string, between the two pieces of cardboard. Carefully remove the cardboard, fluff out the pom-pom, and trim any uneven edges to create a neat and round shape. Repeat this process to make as many pom-poms as you need, and then hang them around your venue to add a touch of whimsy to your wedding decor.
52) Hand-painted glass vases or bottles
Collect secondhand glass vases, bottles, or jars from car boot sales, charity shops, or even the back of your cupboard to repurpose into wedding decor. You’ll also need glass paint, markers, and brushes to create your designs.
Start by thoroughly cleaning the glass to remove any dirt or residue. Then, let your imagination run wild as you hand-paint or decorate each piece with your desired designs. You can create elegant patterns, romantic motifs, or personalised messages for your guests.
Allow the paint to dry completely before handling or displaying the vases or bottles. Once dry, you can use them as eye-catching table decorations, centrepieces, or even flower vases for bouquets.
53) Handmade paper garlands or bunting
Paper garlands or bunting are perfect for tea-party, whimsical, or garden party-themed weddings. To create your own, start by selecting coloured or patterned paper that matches your wedding theme.
Next, cut the paper into triangles, circles, or any other shape you desire for your garlands. You can use scissors or craft punches for precision. Thread the shapes onto string or ribbon, alternating colours and patterns to create visual interest.
Once assembled, hang your paper garlands or bunting along walls, ceilings, or even across outdoor spaces to instantly transform the atmosphere. These DIY decorations are simple yet effective, and they’re sure to delight your guests with their playful charm.
54) Seashell or sea glass candle holders
Seashells and sea glass are beautiful natural treasures that you can use to decorate your wedding reception.
Start by taking a stroll along the beach to collect these beautiful finds. Once collected, give them a gentle wash and let them dry completely. Then, simply place a tealight candle on each shell or piece of sea glass to create a relaxing, coastal ambiance.
You’ll need to find shells or pieces of sea glass big enough to hold a tea light, so start looking for your decor a few months before your wedding to give yourself plenty of time. Make it a tradition to go on a beach walk every weekend with your spouse. What better way to connect than being surrounded by the beautiful coast while you hunt for your wedding decor?
55) Paper pinwheel decorations
Handmade pinwheels are another great way to add whimsy and charm to your wedding decor. To make your own delightful pinwheels, begin by selecting coloured or patterned paper that complements your wedding theme. Cut the paper into squares of equal size, then fold each square diagonally from corner to corner to create a triangle. Make two small cuts from the folded edge towards the centre, leaving about an inch of space between them.
After that, unfold the paper and bring one corner of each cut section towards the centre, securing them with glue or a decorative braid. Finally, attach a wooden stick or a straw to the back of the pinwheel to create a handle. Once complete, scatter these charming pinwheel decorations throughout your venue, or display them in vases for a playful centrepiece.
56) Hand-stitched fabric napkin rings
If you’re skilled at needlepoint, consider putting your talents to good use by creating DIY napkin rings. Start by collecting fabric scraps in colours or patterns that coordinate with your wedding theme then cut the fabric into strips of equal width, making sure they’re long enough to wrap around your napkins comfortably. Fold each strip in half lengthwise and stitch along the open edge to create a tube.
Once you’ve stitched the fabric tubes, turn them inside out to hide the seams and give them a clean finish. Slide them onto your folded napkins and secure them in place with a few stitches or a decorative button.
57) DIY ribbon or fabric backdrop for the ceremony
A ribbon or fabric backdrop will create a charming and eclectic backdrop against which to say your vows. Pick ribbons, fabric, or silks in colours and patterns that complement your wedding theme. You’ll then need a sturdy backdrop frame or simply a long rod from which to hang your ribbons or fabric. Cut the ribbons or fabric into strips of varying lengths, ensuring they’re long enough to drape elegantly when hung.
Once you have your materials ready, start attaching the ribbons or fabric to the backdrop frame or rod. You can use clips, ties, or even simple knots to secure them in place. As you work, layer the ribbons or fabric to create depth and dimension, and feel free to mix and match colours and textures for added visual interest.
Once your backdrop is complete, hang it behind the ceremony space to create a stunning focal point for exchanging your vows and saying “I do.”
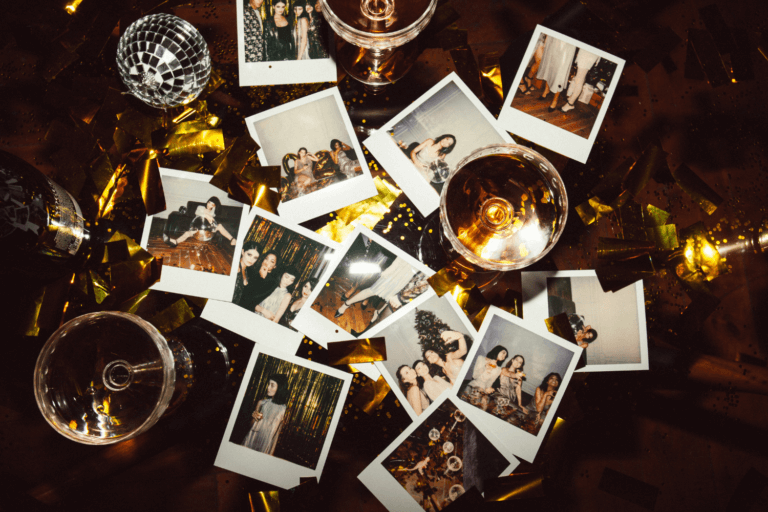
58) Polaroid photo display
This one will require some forward planning, but if you’re a fan of Polaroid or instant pictures, you could use special photos from your relationship as part of your wedding decor.
The best part about these decorations is thar they won’t cost you anything extra, so long as you’ve collected them consistently throughout your relationship. Try pegging your pictures to fairy lights, pinning them to a board, or even displaying them in a photo album for a nostalgic tour through your love story.
Signage and welcome messages
59) Chalkboard signs
Chalkboards are a fun way to get guests to interact with your wedding signs. They add a playful touch and give your guests a chance to interact and leave their own special messages. Instead of a traditional guest book, why not set up a chalkboard where everyone can share their well-wishes, doodles, or words of advice?
To make your chalkboard signs, start by finding a big chalkboard or even using chalkboard paint to create your own on a wall or board. Then, grab some colourful chalk and let guests get creative as they write well-wishes, drawings, or cute quotes.
60) Personalised wooden signs or pallets
Wooden signs are a rustic addition to any wedding ceremony or reception and help your guests navigate your special day.
Start by sourcing some reclaimed wood or wooden pallets. You can often find these at salvage yards or home improvement stores. Then, get crafty with stencils, paint, or wood-burning tools to add your names, wedding date, or meaningful quotes. You can include any information you’d like. For example, a welcome message, a seating plan, or an order of service.
61) DIY seating plan on a vintage mirror
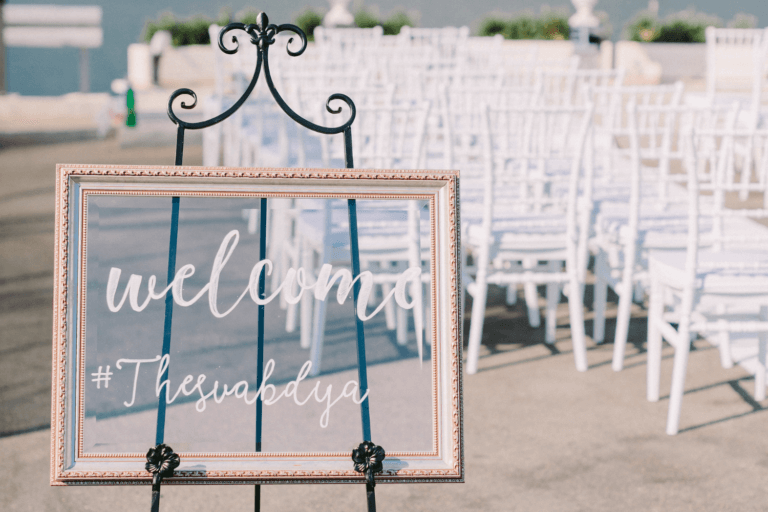
Buy a vintage mirror from a charity shop, car boot sale, or garage sale for the perfect DIY seating plan. Look for one with an ornate frame or interesting details that match your wedding aesthetic. It’ll bring elegance, charm, and beauty to your special day.
Once you have your mirror, clean it thoroughly and decide how you want to arrange your seating plan. You can use vinyl lettering, paint pens, or regular paint and a paintbrush to write out the names and table numbers of your guests directly onto the mirror surface. Spray with a little sealant to prevent chipping, and you’re good to go!
62) Hand-painted canvas banners
A hand-painted canvas banner is a fun and inexpensive way to express your creativity and guide your guests at your wedding.
To make your own banner, start by selecting a canvas fabric in a size and shape that suits your vision. Then, gather your favourite colours of fabric paint and brushes. Sketch your design lightly with pencil before painting to ensure you’re happy with the layout. Then, paint your design onto the canvas, adding details and flourishes as you go.
Hang your banner at the entrance to your venue or near key locations like the ceremony space or reception area to help guests find their way and set the tone for your celebration.
63) Balloon arch with signage
Balloon arches are cheap, easy to build, and look great in photos. With all these pros, there’s no wonder they’re so popular!
You’ll need 100-200 balloons in a range of colours, opacities, and sizes, as well as an arch to attach the balloons to. You can even buy kits where professionals have assembled balloons in the perfect, complementary range of colours and sizes, making the setup process even easier for you.
64) Vintage suitcase sign
Vintage suitcases are perfect for themed weddings, destination weddings, or for any couples with a passion for exploration.
The first step is to hunt for the perfect vintage suitcase. Try exploring charity shops, car boot sales, or asking around friends and family to see what’s in their attic. You never know what hidden gems you might find! Once you’ve found your suitcase, clean it thoroughly and consider giving it a fresh coat of paint or a decorative makeover if needed. Then, personalise it with your chosen signage. You can use vinyl decals, hand-painted lettering, or even attach a printed sign with your wedding details.
Place your vintage suitcase sign at the entrance to your venue, welcoming guests with warmth and style. You can also use it as a creative way to display seating arrangements, guest book instructions, or other important information for your guests. It’s a lovely conversation starter and adds a memorable touch to your wedding decor!
65) Hand-painted wooden signs
If you’d prefer something more sustainable, wooden signs are a recyclable alternative to acrylic or plastic wedding signs.
Start by selecting quality wood boards or planks from sustainable sources. You can often find these at builders merchants, DIY shops, or repurpose old wooden pallets for an eco-friendly option.
Next, sand the wood surface to ensure a smooth finish for painting. Then, choose your paint colours and brushes, and let your creativity flow as you design and paint your signs. You can personalise them with your names, wedding date, welcome messages, or directional signs to guide guests.
Reception accessories
66) Photo booth backdrop
Start by selecting a backdrop material such as fabric, paper, or even a decorative wall mural. Then, add elements that enhance the theme of your wedding, whether it’s floral arrangements, balloons, or themed props. You can also incorporate personalised signage with your names and wedding date for an extra special touch.
Encourage guests to strike a pose and snap away with disposable cameras or their smartphones. The photo booth backdrop will serve as the perfect backdrop for candid and memorable shots that you’ll treasure for years to come.
67) DIY photo booth props
You can’t have a DIY photo booth backdrop without DIY photo booth props! To create your own photo booth props, start by gathering materials like cardstock, foam shapes, wooden sticks, glue, and scissors. Brainstorm a variety of props that fit your wedding theme or reflect your personalities as a couple. Think moustaches, lips, hats, glasses, and signs with funny messages or emojis.
Once you’ve decided on your props, sketch out the designs on the cardstock and carefully cut them out. Attach each prop to a wooden stick using glue or tape, making sure they’re secure enough to withstand plenty of posing. Keep some tape and scissors nearby for impromptu repairs on the night.
68) Polaroid guestbook station
Set up a station with Polaroid or instant cameras, a selection of films, and a designated area for guests to take photos and create memories for your guest book. Provide a variety of props and accessories to encourage creative and fun poses. It’s an engaging and interactive way to have friends and family create your guest book.
Include a sign with instructions inviting guests to snap a photo, write a message on the white border, and place it in your guest book. You can decorate the station with fairy lights, garlands, or personalised signage to make it inviting and memorable. This is another great alternative to a traditional guest book.
69) DIY cake topper
Creating a DIY cake topper is a great way to showcase your creativity and personalise your wedding cake. You can make the topper out of wood, clay, wire, or even paper. Start by deciding on a design that reflects your personality or wedding theme. Next, gather your materials.
If you’re using wood, you’ll need a small piece of wood and tools for carving or cutting. For clay, you’ll need sculpting tools and paint for decorating. Wire toppers require pliers and wire, while paper toppers need sturdy cardstock and adhesive.
Once you have your materials, begin crafting your design. Take your time to ensure each detail is perfect. Add colours, textures, or embellishments as desired to make your topper truly unique.
Remember –- your wedding topper doesn’t just have to go on cake. These DIY cake toppers can go on cupcakes, cheese, pies, or whatever other sweet treat you’re choosing to cut during your wedding reception.
70) Personalised drink station
Set up your very own personalised drink station with your favourite tipple. Simply fill up a stylish beverage dispenser or two with your chosen drinks, set some cups to the side, and let guests serve themselves. Whether it’s refreshing lemonade, fruity sangria, or a signature cocktail that reflects your tastes as a couple, personalised drink stations are always a winner.
Add some decorative touches to the station, such as fresh fruit slices, herb sprigs, or colourful paper straws to match your wedding theme. Don’t forget to provide plenty of ice and consider adding personalised drink stirrers for an extra special touch.
The bottom line on DIY wedding decor
Creating your own DIY wedding decor is a fun and rewarding way to add a personal touch to your special day. Plus, it’s a great way to save some money! It allows you to unleash your creativity and bring your unique vision to life, ensuring that every detail reflects your love story and personalities as a couple.
This comprehensive list of 70 wedding decoration ideas is sure to have something that suits your needs. However, if nothing has quite caught your eye, the beauty of DIY decorations is that you can tailor anything on this list to be exactly how you want it. Take some inspiration, grab a glue gun, and get crafting!
You Might Also Like…
- Top 40 Wedding Table Decoration Ideas
- 52 Best Wedding Centrepiece Ideas
- 15 Wedding Decoration Ideas
- How To Plan a Themed Wedding
- How Much Does Wedding Decor Cost? The 2024 Average Revealed
- How to Save Money on Wedding Decor
